Wednesday, June 10, 2015

Update

Hey lovely beauties! Been a long time I know!! Well, I 'm BACK!!!! What would you all be interested in talking about the most? I am open to anything!

  1. Makeup & Skin Care Reviews
  2. Anti-Aging
  3. Question & Answers
  4. Possibly Live Chit Chat
  5. The Sky's The Limit


    Just let me no in the comment section! I want to hear from you all! My aim/goal is to please you! So Comment, Comment, Comment! I will be in touch soon!


    0298b129f6144e9ab2211b15a6fc1163bab047b0f951e593f4

    Wednesday, February 25, 2015

    Truly Gorgeous Skin

    Hey beauties, as I'm sure you have already noticed I haven't been updating this blog very often! I still will post here occasionally.


    I have started a new blog called Truly Gorgeous Skin and its similar to this blog with great content, honest reviews, how tos, and more! It's just missing 1 very important thing... YOU!! So check it out and be sure to bookmark it! I'm sure you'll ❤ it! Click here to visit now!


    See you there!

    Sunday, October 5, 2014

    New York Fashion Week 2014 – Hottest Trends


    See what the hottest trends from fashion week were from hairstyles to makeup! And check my contest featuring one of the more popular eyeshadows used at fashion week! New York Fashion Week 2014 – Hottest Trends

    How To Keep A Youthful Appearance

    As we age the products we use and even hair color and styles just don't work or look the same way they did when you were younger! Click the link below to learn ways to look youthful whether you're 45 or 65!
    How To Keep A Youthful Appearance

    What Causes Wrinkles- Part 1- Sun Damage

    If you know the causes of wrinkles you'll know how to prevent premature aging and how to keep your skin supple even into your 50's and 60's! Read more here!   What Causes Wrinkles- Part 1- Sun Damage

    Saturday, October 4, 2014

    Maybelline New York Dream Matte Mousse Review

    In need of a makeup suitable for both oily and combination skin?  Read my review by clicking link below!
    Maybelline New York Dream Matte Mousse Review This is one of my favorite foundations! It's easy to blend and looks natural!

    Tuesday, September 17, 2013

    5 Hot Lipsticks For Fall 2013


    Summers pinks, corals, and bright reds turn dark & romantic this fall! This fall's trends consist of deep Burgundy's, crimson reds, pigmented purple, & gorgeous fuchsia's. Here is a list of 5 HOT lipsticks for Fall 2013!

    1. Wet n Wild Mega Last Matte Lipstick 917 B 
    This long wearing lipstick leaves a semi-matte cream finish in one stroke. It glides on easily giving you a rich velvety color that won't feather, cake, or bleed. This my personal favorite!

    2. Mac Cosmetics lipstick Ruby Woo
    This is beautiful pigmented matte ruby red lipstick. literally lasts all day long! Just be sure to apply a really good lip balm before applying it as it is very drying!

    3. Maybelline Color Sensational Chocolate Lust Lip Gloss
    This a beautiful brownish brick red lip gloss. Great for anyone with warm undertones. It is long lasting and has just the right amount of shine. This gloss is the perfect staple for the fall!

    4. Spectrum Cosmetics Lip Glaze in Debra Ann
    With this deep plummy red lip glaze you get the shine of lip gloss and the creamy opaque color of a lipstick.

    5. Nars Velvet Matte Lip Pencil In Mysterious Red
    With this dark crimson red color lips are instantly saturated with rich pigments and a velvety matte finish. It is long-lasting non-drying and has a creamy texture.

    Let me no what your favorite fall lipsticks are in the comments below!

    Please follow my blog, share it, and add me to you Google+ Circle

    Be Sure add your site name and link to blogroll on the side.


    Photo Credit: Photo by Ambrozjo Sxc.hu

    Tuesday, July 23, 2013

    Handy Tips for Controlling Dry and Oily Skin

    
    Guest Post written By
    Micheala Connolly
    Not everyone is fortunate to have the almighty normal skin type. So many dry and oily skin sufferers are usually at their wits end when it comes to establishing a normal skin cleansing regime. If you’re struggling to determine your skin type or simply looking for a few tips on maintaining healthy skin then continue reading on. If you require any further information about general skin matters, then please click here.
    Determining your skin type
    If you are unsure of your skin type it is advisable to visit a dermatologist. If you’re a bit short on cash and would like to determine your skin type yourself, here’s how you can do it:
    1. Does your skin feel tight after washing/showering? If you apply a tissue to your face (for a blot test) does it still appear dry? Do you often find that areas around your face flake? Including your nose, cheeks and forehead? If you have answered yes to all of these then it seems likely that you have dry skin. Dry skin is more prone to aging effects.


    1. Does your skin produce frequent blackheads/whiteheads? Does it look shiny in areas such as the nose, t-zone and chin? If you carry out the blot test does it pick up a lot of moisture? If you have answered yes to all of these then it seems likely that you have oily skin. Oily skin is more prone to contain blemishes.


    Tips for Controlling Dry Skin
    • Avoid hot showers– hot water dries up the natural oils found in the skin. You will often find that having a hot shower will make your dry skin feel tight and uncomfortable. Warm and short showers are best for those with this skin type.


    • Moisturise daily – investing in a quality raw virgin coconut oil or a rich water based moisturiser, designed for those with dry skin, is ideal for maintaining soft and supple skin. It is best to apply the moisturiser only to the areas affected; this usually includes the t-zone (forehead, nose, & chin) and the areas around the eyebrows. Too much moisturiser will only make the skin appear greasy.


    • Avoid harsh soaps/cleansers- make sure that you purchase cleansers and soaps that are ideal for sensitive/dry skin. Remember that over scrubbing of the skin makes it much worse, not only does it remove the natural oils found there but it increases irritation. This will likely increase bouts of dry skin.


    • Shave properly – it is extremely important that both men and women use clean razors with a sensitive gel bar to avoid skin rashes/dry skin irritation. Furthermore, a shave gel should always be used to add extra moisture to the skin when the pores are opened in the shower.


    • Protect the skin – applying an SPF sunscreen will protect the skin from burning and therefore drying out, particularly in the summer months. This is important as dry skin results in premature aging. UV radiation is a huge contributor to skin cancer and causes the skin to appear old and haggard in excess.
    Tips for Controlling Oily Skin
    • Use a toner – the aim of a toner is to lower the skins PH. In this instance, it should only be the extremely oily skin sufferers who incorporate this into their routine.


    • Don’t use too much moisturiser – remember that your oily skin means that you don’t have to moisturise dry skin. Many oily skin people find that they only need to apply a small amount of oil-free moisturiser on problem dry areas for example.


    • Use clay masks – use a clay mask once a week to ensure your skin is cleansed properly in a very gentle way. These masks are great for getting rid of excess dirt, skin cells and even more importantly – oil.


    • Exfoliate – one of the causes of acne breakouts its excess dirt found within the skin. The purpose of exfoliation is to remove dead skin cells and thoroughly clean the skin. Oily skinned people should take great care when exfoliating, although it is often beneficial, it can also lead to the development of further acne breakouts.

    Avoid microdermabrasion – purchasing spa treatments are great for relaxation but I’d say that’s as far as they go! Microdermabrasion will leave your skin feeling soft for the first few days (if you’re lucky) but many women experience acne breakouts shortly after, especially if they have oily skin.

     
    Author Bio
    Hi, my name is Micheala and I love writing articles about skin health. I think it’s important that we look after our skin, especially in today’s current climate! All those free radicals and excessive UV rays can’t be good for us. I like to provide advice for both men and women regarding skin conditions, treatments and pay particular attention to natural remedies. For more information please visit my site at: http://www.dermatologist.org.uk/do-you-need-a-dermatologist.html

    Saturday, July 6, 2013

    Oil Pulling

    How To Oil Pull

    1) Brush your teeth with water to remove food particles! Don't use toothpaste!
    2) Have an empty stomach, best to do first thing in morning. If not, do it at least 2 hours after your last meal or drink.
    3) Pour 1-2 tablespoon of sunflower oil, sesame seed  oil, of my personal favorite coconut oil into your mouth.
    4) Swish the oil around in your mouth and through your teeth for 20 minutes.
    5) Spit the oil out in the trash as the oil will solidify and clog your pipes. Rinse your mouth out with warm salt water 5 or more times.
    6) Brush your teeth with a pure soap or baking soda! Do NOT use toothpaste!!

    How does Oil Pulling work?

    Oil Pulling works because the oil penetrates between the teeth and all the crevices in the mouth, it attaches to bacteria in your mouth over the 20 minute period. When you spit and wash your mouth, the bacteria that normally would have infiltrated your bloodstream is gone.

    Possible Side Effects

    It is a detox, so people seem to experience the following between the 2 and 7 day mark of oil pulling:

    1) Sinus drainage, runny nose, sore throat
    2) Trouble waking up in the morning from a deep sleep
    3) Acne
    4) Fever

    Oil pulling should be done until side effects cease! You can do it longer but take at least a 1 week break after 4 weeks! If you don't take a break from oil pulling you will start to take away the good bacteria, vitamins, and more! Which could cause other problems like sensitive teeth! If you have sensitive teeth prior to starting oil pulling it may get worst temporarily as a side effect! 

    Health issues oil pulling has been known to aid with and in some cases cure (based on individual accounts):

    · Acne- It may get worse temporarily, which means your body is responding to the process.

    · Arterio Thrombosis

    · Arthritis- Noticed I don't have nearly as much pain as before and only oil pull every other day!

    · Bad Breath- Works just as well or better than any toothpaste.

    · Bleeding Gums- My gums have stopped bleeding.

    · Bronchitis

    · Candida Overgrowth

    · Chronic / Acute Sinusitis (Sinus Infections)

    · Chronic Blood Disorders Such As Leukemia

    · Chronic Diseases Digestive Problems

    · Constipation

    · Crohns Disease

    · Diabetes

    · Eczema

    · Gingivitis / Gum Disease

    · Heart Disease

    · Insomnia

    · Irritable Bowel Syndrome (Ibs)

    · Kidney Disease

    · Migraine Headaches

    · Neuro Physiological Paralysis

    · Post Nasal Drip

    · Skin Conditions

    · Tooth Decay

    · Ulcers

    · Whitens Teeth- I have noticed a difference already!

    · White Tongue

    · Women’s Diseases

    In most cases, if you have some ailments, the symptoms of your disease would get worse after you have performed oil pulling for some time. Do not be alarmed by the worsening of the symptoms of your disease since this is an indication that your body is responding to the oil pulling treatment.

    The best oil is Tropical Traditions Gold Label Virgin Coconut Oil!

    I just starting oil pulling today. I will share my results in about 4 weeks!
    posted from Bloggeroid

    Monday, June 24, 2013

    Honey For Acne

    Happy Acne Awareness month! Add me on google+(see link on the side), follow me on Twitter @ MzTisa05 and subscribe to the blog! I will sharing lots of tips, tricks, ways, & method to keep your complexion clear, acne free, and beautiful!

    Let me no in the comment section what you have tried! Ask any questions you have and I will do my best to answer them!

    DON'T use honey if you are allergic to bees or pollen!

    I have mention the use of honey for acne in a early post! If you haven't read it click here ~~> Easy Ways To Get Rid Of Acne  Well now I'm going to elaborate a more on how to do it, which type of products to use, and the effects it has on your skin.

    How To Use Honey To Get Rid Of Acne
    Honey alone will only help treat your current breakout by soothing and healing it. You have to use an organic apple cider vinegar rinse with it! See which vrand to use below.
    Wash your hands and clean your face. Nuke the honey in the microwave for a few seconds and using your hands massage it in a  circular  motion over your face for 30 seconds to a minute and then smooth over your entire face! Leave as long as you choose but no less than 15 minutes!
    Mix a solution of vinegar and water at a ratio of 1:1, 1:2, 1:3, etc! What ration of vinegar to water you choose depends on your skin! If you have very sensitive skin you should  want to start with 1 parts vinegar to 8 parts water and if theres no irratation you can slowly work your way up! If you have normal I recommend you start with 1 part vinegar to 6 parts water! It's up to you. Just be sure to test an area behind the ear first!
    Rinse off the honey with the soloution and leave the vinegar mix on your skin don't rinse it with water or dry your face! Leave it on for 15 minutes to 1 hour and rinse with water. Pat face dry and apply a moisturizer. Do this once a day for at least a week. Then in addition to the honey mask and vinegar rinse you can increase to twice a day. After a month you can apply the vinegar alone upto 2 times a day if you have oily or nornal skin. No more then once a day for dry skin. Just make sure you rinse off before going in the sunlight. You should see noticable results after 2 weeks!

    Which Products To Use
    As far as honey goes you can use any brand of raw honey. Dr. Mercolas is the best. You can also use Manuka honey which is said to be the best. I believe Dr. Mercola sells Manuka honey as well! The type really matters in this case. Your regular grocery store honey isn't going to work! Most are just honey flavored!
    As far as  apple cider vinegar any organic brand unfiltered brand will work but I
    HIGHLY recommend using Bragg Apple Cider Vinegar!  It is a little more expensive but worth it! The cheapest place I've found is The Vitamin Shopp The 16 oz is currently on sale for $2.67.

    Warnings**
    1. If your skin is sensitive use more water like 8 parts water to 1 part vinegar. Slowly decrease the water amount until you find a balance your skin loves!
    2. Stay out of the sunlight with vinegar on your skin! It sill make dark marks and scars darker.
    3. Don't use honey if you are allergic to bees or pollen!!!
    4 Always spot test your skin and wait 24 hours before trying anything new to see how your skin will take it! Behind the ear is good place!
    5.Your acne may get worse before it gets better as the vinegar pulls the toxins from your skin! This is normal it won't last long. Try some of my remedies in the other post mentioned above! The lenon juice or tomatoe remedy may help!
    posted from Bloggeroid

    Sunday, June 16, 2013

    Top 25 Beauty MisHaps

    Based on a study of 2000 women commissioned by Sara Wolverson of Superdrug. The following are the top 25 worst beauty mishaps!

    TOP 25 BEAUTY BLUNDERS

    1. Heavily penciled eyebrows

    2. Foundation marks around the chin

    3. Trout pouts

    4. Over-plucking of eyebrows

    5. Dark lip-liner with pale lipstick

    6. Palms of hands going orange from not washing after applying tan

    7. Mono-brow

    8. Greasy hair

    9. Hairy legs

    10. Lipstick on teeth

    11. Too much make-up

    12. Yellow teeth

    13. Too much blusher

    14. Yellow hard skin on feet

    15. Gems stuck onto your tooth

    16. Lip liner outside the edge of the lips

    17. Bad hair extensions

    18. Clumpy mascara

    19. Gelling hair to your face in swirls

    20. Pierced finger nails

    21. Fake beauty spots

    22. Sunburn

    23. Roots showing (need highlights doing)

    24. Panda eyes from sunbathing in sunglasses

    25. Wearing make-up to bed
    comogenic
    Some of these beauty mistakes cause a lot of the skin care problems a lot of us deal with including:
    • Acne-Too much makeup clogs pores and traps dirt and oil in them causing acne!
    • Short thin Eyelashes- Mascara especially when worn heavy and often will break off your eyelashes and make them weak and brittle. Fake eye lashes are  even worse.
    • Short brittle damaged hair- Bad hair extensions and wearing hair extensions often will weaken your hair and cause it to break off.
    So now you no what the top 25 beauty mishaps are! Which means you now no what not to do! Go over this list and be sure you aren't doing any! Not doing some of these things can make your skin and hair healthier.

    If you enjoyed this post please comment, rate, share, follow me on Google+. Also be sure to click the UpTweet to share this post on twitter! I allow posting of links in the comment section as long as you also write a positive comment! Thanks for viewing please bookmark and follow as I have many great posts coming soon! 

    Please help support this blog by clicking on the advertisements!

    Thursday, April 18, 2013

    Easy Ways To Get Rid Of Acne

    We all have skin problems at some point in our life! I'm here to help you solve your skin care problems! Today I'll be focusing on Acne! Ways to prevent it, remove it, and ways to help with acne scars! Read all my blog posts they all are helpful & informative. Definitely be sure to checkout Simple Tips to Achieve Beautiful Skin. For bad breakouts I recommend numbers 12, 8, and 14

    10 Ways To Get Rid Of Acne

    1.Wash Your Face
    Wash your face twice a day everyday with a mild cleanser! Once in the morning and once before bed!

    2.Apply Crushed Aspirin To Your acne: Crush up aspirin & add water to make a paste. Apply to your acne leave on overnight & rinse off the next morning!

    3.Tomatoes: Slice a tomato in half and rub it over your acne. Leave on 15 minutes to an hour then rinse off!

    4.Garlic: Garlic is a quick way to remove acne! Just cut a fresh clove of garlic and rub it on your acne!

    5.Apply Toothpaste To Your Pimples: Only use white paste toothpaste not the gel! Crest. Toothpaste works best! Dab on each pimple and leave on overnight. Wash off the next morning! If you have sensitive skin leave on no more than 2-3 hours or as long as your skin can take.

    6.Apply Mint Juice: Apply fresh mint juice to your face every night.

    7.Unclog Pores With Salicylic: Clog pores lead to acne. Use simultaneously with sunscreen.

    8.Use Tea Tree Oil Extract: Use this oil  in exchange of  benzoyle peroxide! Apply to the skin in small amounts. Mix equal parts of tea tree oil extract and water and use a Q-Tip to dab pimples with the mixture. Use in small quantities Stay away from tea tree oil if you have very sensitive skin or you have eczema in addition to acne.

    9.Salt Water Paste: Take a little table salt and crush it up finely using the back of a spoon, then add a few drops of water,and mix until a paste forms. Wash and dry your face then apply to your blemish or pimple. Leave on overnight or a couple hours if your skin is sensitive! Then wash of the next morning!

    10.Blistex: Use the blistex in the tube although the ointment kind will work just not as well! Wash and dry your face and apply to acne and leave overnight and wash off the next morning.

    11.Crystallized Deodorant: Wash and dry your face. Apply the deodorant to your face. Leave on overnight, and wash off the next morning. You should be able to find this at Walmart, dollar store, etc
    along with the other deodorants!

     12. Fresh Lemon Juice: Fresh lemon juice is great for your skin! It will get rid of pimples, blackheads, freckles, age spots, scars, and more! It also is good for your skin. It will soften it and give you a brighter healthier complexion! If your skin is sensitive dilute it with water! I recommend 1 parts water to 2 parts lemon juice! It will sting a little the first 2-3 times you use it which is normal! If it irritates your skin a lot and or causes redness then your skin is too sensitive for it and you should dilute it with water! Wash and dry the area you will be applying it. Then rub the fresh lemon juice all over your face or where ever needed before bed and leave it on overnight. The next morning rinse with cool water! Warning: Stay out of the sun for at least 4-5 hours after applying it!

    13. Filtered Water: Our skin needs lots of water to keep it plump, flush out toxins, and build new skin cells! You should drink at least ten 8 ounce glasses of filtered water everyday! When you provide your skin with the quantity and quality of water it needs you will reveal healthier, fresher, more supple skin!

    14.Honey:Use a natural honey!. Remove lid and microwave 10-15 seconds until warm!  Cleanse your face and hands. Using your hands spread the honey over your skin and massage it in using a circular upwards motion! Leave on as long as you want. I recommend 1 hour or more! Rinse off in a mixture of equal parts water and apple cider vinegar! Once honey is rinsed off rinse once more and let set 5 minutes to 1 hour and rinse. Stay out of the sun with the vinegar mixture on your skin! Your skin will be soft and supple and it will get rid of your acne over time as well as scars and dark spots! Can be used daily. Try the honey below.

    15.Brag Organic Apple Cider Vinegar: You can purchase this at health food stores, Kroger's, and I believe Walmart has it! Mix equal parts water and vinegar and apply to you face! Leave on an hour or more and rinse off! You can do this 2-4 times a day. no more than twice if your skin is dry. Stay out of sunlight while it is on your skin! If you have to leave in the middle of a treatment just wash it off before going outside!


    Tips
    1. Always moisturize with a  non pore clogging lotion. It will say it on the bottle
    2. Stay out of the sunlight when you have lemon juice or vinegar on your skin.
    3. Exfoliate your skin 3-4 times a week! Use baking soda, sugar, or brown sugar and mix with water to form a grainy paste and rub skin in a circular upward motion then rinse.
    4. Remember this are all natural ways so they will tke sometime to see results but there re no side effects and it is much cheaper!.

    Tuesday, March 19, 2013

    Easy Ways To Prevent/Get rid of a Hangover

    *I am currently interested in doing guest posts please email me at Martisa05@gmail.com if you are interested! Also add my blog link to your blog or website and I'll do the same! Just email at Martisa05@gmail.com with your link, the link to the page where my link is posted, and we can go from there!


    This post may not really pertain to beauty/skin care but I felt it was needed and would really help out a lot of people! I personally have only consumed alcohol a couple of times in my lifetime, but I no how awful a hangover can be! So here is a list of ways to tame, eradicate, or even stop a hangover altogether! Please share, tweet, subscribe, and comment!

            10 Ways to stop or decrease the affects of a hangover!

    1. Drink Water: Alcohol dehydrates you which is causes headaches! So to prevent that early more head pounding drink one glass of water for each drink of alcohol you consume! This will also slow your drinking down which means your body will have a chance to process some of the alcohol before you take in before your next drink! At the end of the drink a serving or 2 of Powerade! It hydrates you and replenishes your electrolytes and sodium levels! It is also said to prevent hangovers! I no a lot of people who swear buy it including my sister! She drinks a Powerade before she drinks, and after her last drink, and then the next morning! She gets drunk and then gets up at &:00am and goes to school and from school straight to work! So I'd say its worth trying! I recommend the red, orange, or blue Powerades!
    2. Eat: Consume a decent size meal before you pop open that bottle! Drinking on an empty stomach allows the alcohol to be absorbed much faster! Eat a meal full of healthy carbs to slow down the absorption speed! I also don't recommend eating once you have started drinking, because that tends to lead to nausea and vomiting! If you have to eat after you've began drinking keep it light!
    3. Drink Light: Dark alcohol such as red wine and rum contain congeners which may cause hangovers! Go for a shot of vodka or or a glass of Chardonnay!
    4. Olive Oil: If you'd rather not eat or started drinking before you realized you hadn't ate and haven't drunk much ( 1 shot) then  swallow a tablespoon of olive oil.
    5. Stick To One Type of Alcohol: Don't drink Vodka, beer, and wine or dark and light alcohol! Stick to one thing or the other!
    6. Aspirin: You can take a dose of aspirin the next aspirin if needed but NEVER take an aspirin before drinking!!
    7. Milk: Drink a glass of milk. It coats the lining of the stomach which slows down the rate at which the alcohol is absorbed.
    8. Beware of the Bubbles: The bubbles increase the delivery of alcohol through your system causing you to become drunk much faster! So stay away from Champagne, sparkling wine, carbonated mixes, and soda/pop as well.
    9. Caffeine: Stay away from caffeine when consuming alcohol. Caffeine can cause diarrhea and a stuffy head when combined with alcohol! ** Warning- Its best not to consume any caffeine when drinking alcohol, as too much caffeine mixed with too much alcohol can lead to a severe, and possibly fatal, increase in heartbeat.
    10. Coconut Water: Drink a cup of coconut water along with a cup of Powerade! They both replenish your electrolytes and potassium.
                                        The Next Morning

    1. Breakfast: Scramble up a couple eggs  and have drink of orange juice. Scrambled eggs are shown to reverse liver damage that a night of heavy drinking can cause. Alcohol drops your blood sugar so drink a glass of delicious orange juice to bring it back up!
    2. Nausea: If you have nausea brew up some ginger tea. You can also eat some burnt toast with butter and honey! The burnt toast will also absorb excess alcohol remaining in your stomach and the honey will give you an energy boost!
    3. Aspirin: You can take an aspirin if needed but avoid any other medications and only take aspirin at the end of night or even better the next morning!  Never take before drinking!

                                                                 Advice
    Never drink and drive! Always arrange a driver or a cab to take you home!
    It's best not to drink but if you choose to please be safe!

    Wednesday, February 13, 2013

    How To Get A Brighter Whiter Smile Without Breaking The Bank Update 03/12/2013


    If you would like a better brighter smile follow these tips and advice! A better smile you more confident. Smiling makes you look younger, happier, and boosts not only your mood but those around you. Here are a few ways to enhance and brighten your smile! *Note- See instructions on how to do each way and how it works below the list.

    Inexpensive Ways To Whiten Your Teeth      
    1. Brush your Teeth twice a day, rinse, floss, and replace your toothbrush every 3 months.                                                           2. Eat crunchy fruits & vegetables like carrots, apples, & celery.                                                                     
    3. Strawberries & Baking Soda                                                                        
    4. Orange Peel                                                                       
    5. Crest White Strips 
    6. Hydrogen Peroxide
    7. Regular teeth cleanings
    8. Sexy Smile Lip Gloss(See below for exact details)
    9. Go Smile Whitening System For sensitive teeth
    10. Lemon Peel
    11. Apple Cider & White Vinegar


    Instructions, information, and more on the above list.
    1. Use a whitening toothpaste (Crest & Colgate are the best brands) such as Colgate Pro Clinical Daily Whitening toothpaste. Rinse with a good whitening  mouth rinse such as Listerine Whitening Restoring Fluoride Rinse. It whitens your teeth 2 shades & restores the enamel.
    2. Crunchy fruits and vegetables like carrots, apples, and celery are natural teeth whiteners. They trigger your mouth to make saliva, which washes away food particles so they aren't able to stain teeth. Strawberries have an enzyme that acts like natural bleach. Broccoli has minerals that form a film on teeth so pigments from other foods won’t stain them.
    3. Strawberries contain an enzyme which is a natural tooth whitener. There are ways to use use strawberries for whitening teeth. One way is by just cutting or biting the tip of and just rub it on your teeth for as long as you choose. The 2nd way is by by biting the tip of and adding baking soda to it and rub that on your teeth as long as you choose. You can use the following process also for optimal whitening results. That process is to be used as follows:
    • Take a few strawberries and make a paste of  these strawberries
    •  Use a toothbrush, q-tip, or your finger to apply the paste to the teeth, so as to form a thick layer and leave the paste on the teeth for  2-5 minutes
    •  Wash off the strawberry paste thoroughly including the seeds. Then brush the teeth with a fluoride toothpaste, so that the acid in the strawberry do not affect the teeth.
    •  You can also add baking soda to the strawberry paste for whitening. This preparation should be used only once a week or less frequently, since the malic acid in strawberries can harm the teeth.

    The strawberry and baking soda process should only be used once a weekHowever if you are just rubbing the straight strawberry to whiten you can use that process 3-4 times a week! Also after using any of the above tecqniues rinse with a fluoride mouthwash!

    4.Rub your teeth with the inside part of an orange peel. Don't use the fruit just the peeling.
    5.For Crest White Strips just following the directions given on the box.
    6. Mix one teaspoon of hydrogen peroxide with a teaspoon of baking soda an add just enough water to make a paste. Scoop it onto your toothbrush your teeth with it. DON'T swallow it and rinse your mouth with water when done. Use this pate once or twice a week in place of your toothpaste. Another way to use Hydrogen Peroxide is by rinsing your mouth with it for 2-3 minutes (it will foam up). Then make a paste with baking soda, salt & enough water to make a paste. Brush your teeth with the paste.
    7. See your dentist twice a year for regular teeth cleanings.
    8. Sexy Smile lip gloss is double ended and one side is a lip gloss which has blue based pigments to make your teeth look whiter. The other end contains a hydrogen peroxide fluid to brush onto teeth. It is $29.50 and can be purchased at Sexy Smile. Or you can just purchase your own much much cheaper lip gloss and mix Hydrogen Peroxide and baking soda together to form a paste and use your tooth brush or a q tip to apply it. Expensive version $29.50 plus shipping, cheap version $3-6 (depends on the price of your lip gloss) plus 75 cents for a peroxide, and maybe $1.50 for the baking soda. So at the highest about $10.00 and you'll get the results if not better! Check this website out 17 Best Lip Glosses.
    9. This systems is $89 Which I no is a little expensive but because it was rated zero on the teeth sensitivity scale and it can be used on veneers and crowns I decided it was definitely worth adding!!!
    10. rub the inner side of the lemon rind on your teeth. Wait 5-15 minutes and rinse with water(rinsing is very important so don't skip this step) You can also add some table salt to the rind for an added effect!
    11. Apple Cider and White Vinegar can help to whiten your teeth! Just brush your teeth everyday with a little of the vinegar.


    Please comment and share! Let me no what subjects you would like to me to blog about! Also be sure to check out Fashion Haunt & My Clozet Thank you for visiting please check back often, tweet about my blog and let your friends no about it.


    Image courtesy of Stuart Miles / FreeDigitalPhotos.net


    Friday, November 2, 2012

    Makeup Tips To Enhance Blue Eyes


    PICK THE RIGHT EYE SHADOW
    If you're looking to enhance your blue eyes and make them pop, the best eye shadow color to use is any hue of the color orange. Such as gold, peach, orangey brow, & even many pinks! If you deep dark blue eyes use a deep dark hue of orange & if you have light blue eyes use a lighter color!

    For the office, stick with eye shadow in brown, rose, lavender and neutral shades. For a special date, blue-eyed women can try metallics (both silver and especially gold work well), turquoise and icy pink. For evening, dark blue mascara looks fabulous on blue eyes, especially when paired with smudged charcoal eyeliner. Try smoky eye pallet with gray, dark blue or purple shadow. "For blue eyes, choose dark blue (the dark blue tones help to bring out the natural blue tones in your eyes), grey, silver, violet or lavender. Unless you have light almost gray eyes than you don't want to go to dark! Stick with medium to light colors! You can use a dark color in the crease. For night time, blue combined with black is a great look. For eyeliner or mascara, try navy instead of black for a dramatic look.
    FINISHING TOUCHES
    Emphasize your gorgeous blue eyes, whether they are pale blue or deep sapphire, by toning down yor lip color. You don't want your lips competing with your eyes! No point going through all the work to make your eyes pop if you're going to put a red lipstick on! Pick a matte lipstick in a peachy brown shade. For your cheeks, add light sweep of blush in a natural hue! Follow this advice and you'll stunning and the guys will have a hard time keeping their eyesof you! Remember never be afraid to experiment! If all else fails any eye shadow with an orange tone will work, such as, gold, bronze, copper, peachy, etc! Check out my other posts! Purchase all your makeup and skin care products at

    Monday, October 22, 2012

    Simple Tips To Enhance Your Gorgeous Green Eyes

     Tips To Enhance Your Green Eyes
     For those of you with green eyes, it can sometimes be difficult to find the right eye shadow to perfectly compliment those gorgeous eyes. But don't worry, because some of the best makeup artists have said that green eyes are the best to work with!

     When you're wanting to really make those green eyes pop, start with a simple eye shadow. A shade of brown, such as chocolate tones, will perfectly highlight those copper tones and bright green flecks. A nice gold, or copper can not only bring out the other copper flecks, but also make the green pop. Another really good color for green eyes would be a purple shade. Dark purple, plum, lilac, even metallic purples look amazing against those emerald colored eyes. If you have close-set eyes, make them look a bit wider by applying a shade of a deep plum color towards the outer edges of your eyelid. Add lighter shades towards the inner corners of the lid. But, if perhaps your eyes are a little droopier, make them look more renewed by doing the opposite, with darker colors towards the inner corners, and lighter tones towards the outer corners. While purples can be very beneficial to green eyes, try to avoid the purple shadows with blue undertones. Try to stick with purple shades that have a light silver undertone.

     As for eyeliner, skip the black eyeliner! Black will do nothing good for those gorgeous green eyes. Black will only make them look smaller, messier, and make them all merge together. When pursuing eye liner, the point is to make the eyes pop from the face; make them look bigger, brighter, and more noticeable. When you have fabulously green eyes, use chocolate browns, gray, or gold. To really add a nice pop, add a little bit of white liner near the corners of the tear ducts. This will make your eyes look much brighter and add a more brilliant color.

     Something a lot of girls with green eyes have found, is that green shades also help pop your greens. Adding a shade of green that is either much darker than your eye color, or much lighter, will significantly pop the color of your green and make it much more noticeable. Framing your eyes in a darker or lighter shade will make them look like bright green emeralds. Basically, when looking for a nice, suitable color for green eyes, stick with warm, sultry colors.

     While warm, sultry colors work great, and there is a very broad spectrum of colors that would look fabulous, there are definitely some colors you should avoid at all costs. Pink shades should definitely be avoided if you have green eyes. Shades like pink will make your eyes look very drab and unhealthy, and the goal is to make your eyes look awesome and vibrant. Another light shade to be avoided is silver. Silver will not do anything for you. Just leave them alone. Silvers will make blue eyes pop, but not green. Like pink, these will leave your eyes looking dull and boring. So, basically, avoid light, or pale shades, blacks, and blues. Stick with warm colors, or purples and your green eyes will be looking gorgeous!

    Check the following items out!

    Thursday, September 6, 2012

    Simple Makeup Tips To Enhance Your Gorgeous Brown Eyes

    When it comes to brown eyes, almost any eyeshadow color works well! The determining factor is the depth of the eye color. Are they almost black, or are they medium brown? Women with brown eyes can also pull off both black and brown eyeliner (brown works best in the day and black at night).

    DEEP BROWN EYES:For dark brown eyes, medium to dark shades of eye shadow will work best for you. Try forest green, plum, or charcoal gray. You can also try dark brown, gold, mauve, and bronze colors on your eyes! Look in the mirror there are likely flecks of lighter color in your eyes, use those hues to select your eyeliner color. Be creative & experiment with different colors and combinations till you get the perfect look!

    MEDIUM BROWN EYES: Medium to light brown eyes can wear green, violet or bronze colored eye shadows. A purple or green eye shadow palette can work well for daytime. Experiment by pairing neutral shadow with metallic eyeliner in copper or bronze for evening.

    LIGHTBROWN EYES:If you have light brown eyes AVOID black eyeliner all together! Use dark brown or other colors instead. Apply a neutral shade of shadow on the lid, a darker hue of the same color in the crease, then line your eyes in gold or green to reflect the flecks of color in your eyes.

    If your eyes are so light they are hazel, you should try champagne tones with bronze, brown, or violet eyeliner to define your eyes.


    Check out http://youravon.com/Martisa to purchase your eye shadows and eyeliners!

    Monday, September 3, 2012

    Cosmetic Surgery

    Guest Post by Rod Kelly

    How Cosmetic Surgery Can Be a Complete Solution for Your Beauty Needs
    Every woman awakens every morning, grabs a cup of java and eventually makes her way to the bathroom mirror. What do we see when we get there? Well, any number of kind hearted people can tell us we look beautiful, but the truth is none of see what they do. As we get older, we begin to notice every new imperfection on our face, every laugh line, every bit of crow's feet, new freckles or anything else that just happens to blow up and land on our face. So, what do we do about it? Whatever it takes to cover them up, of course!

    Each year millions of women purchase an ungodly amount of products meant to do just that: cover our imperfections. Trust me, the makeup industry is booming! The trouble is we believe for some reason that the more we spend on a particular product, the better it's going to work. Not so. We buy everything from new and improved foundation in the form of mousse or pressed powder. We see something advertised on TV and we un-realistically think that we can look as good as the supermodel advertising it. The truth be known, no matter what we buy or how much it costs, we just can't turn back the hands of time. So, what do we do now? Where do we turn to restore our youthful features when the chemical peel doesn't quite do the trick? Some women seek out a dermatologist in order to receive a prescription for some of the latest efforts in skin restoration and beauty products not yet available on the market to the general public. Others go one step further.
    Well, drastic times call for drastic measures, right! Of course the only thing left to do is to look into a little help from above, and by above I mean the plastic surgeon's office on the nineteenth floor of the big skyscraper downtown. Cosmetic surgery has been around for a long time and several advancements in procedures have allowed a patient to walk into the office in the morning and come out by mid-afternoon looking twenty years younger. Cosmetic surgery, of some kind, to improve our looks and make us appear more youthful, isg performed on unhappy, dissatisfied women every day But once we become satisfied with our new and improved facial beauty, do we now start to obsess about the imperfections of the rest of our bodies? Lucky for us there is a surgical procedure for everything.

    About the Author: My name is Rod Kelly, a content writer from UK. I am into Health. Visit my website at http://www.cosmeticsurgeryconsultants.co.uk/
    You can follow me @thefreshhealth :)
    ;

    Tuesday, August 14, 2012

    Warm Lemon Water Diet- Simply Amazing

    Drinking warm lemon water can do wonders for your body! Squeeze 1/2 of lemon into a glass, add 6 oz of lukewarm or room temperature water to it, mix it, and drink it on an empty stomach first thing in the morning, before eating or drinking anything else! After drinking it you should exercise by walking, running, or doing aerobics for 15-30 minutes! An hour after drinking the lemon water eat a fruit only breakfast!

    What Does Warm Lemon Water Do For Your Body?
    1. It helps you lose weight. Without exercise you will likely lose 5-10 lbs a month. With exercise you could lose 10-18 lbs a month or more! It just depends on how much exercise you do, how often you drink the water, and if you only eat fruit for breakfast!
    2. Promotes immune system & heart health
    3. It regulates the bowels
    4. Stimulates the liver
    5. It relieves bloating & heartburn
    6. Helps those with Rheumatism
    7.Helps relieve the symptoms of gout
    8. When taken regularly while pregnant it will help to build bone in the child and promote a healthy system
    9. Useful in treating asthma, sore throat, coughs, colds, flu, & fevers
    10. Can help with kidney stones
    11. Naturally cleanses the body of toxins especially thpe liver
    12. Clears The Skin. It decreases wrinkles and blemislhes. It purges the blood of toxins, which helps keep skin clear also!
    13. Aids in digestion
    14. Increases energy
    15. Hydrates the lymph system
    16. Balances your body's Ph

    What Not To Do
    1. DON'T add sugar- It takes the effect of it away!
    2. DON'T use store bought concentrated lemon juice!
    3. DONT mix it with anything other than water!

    Extras
    1.For weight loss drink 2 whole lemons worth of juice a day! One first thing in the morning before you eat or drink anything! The second an hour before dinner! A whole juices lemon should be mixed with atleast 10 ounces of water! No more then 16 ounces! I recommended 12 ounces to a whole lemon and 6 to a half!
    2. To sweeten you can add up to 2 teaspoons of HONEY no sugar!

    I am on my 5th day & I'm loving it! It has notivated me to start exercising. I walk everyday! Some of the effects I've noticed are:
    1.More Energy
    2.Weight loss- 2lbs
    3.It got rid of my soar throat
    4.I drink less pop and juice
    5.I can tell my system is being cleaned
    6. I'm usually bloated nearly everyday! But I've only been bloated once since I started & it wasn't as bad as normally

    ** The 1st couple days as it cleans your system you will urinate a lot so don't go to far away from a bathroom! I've been going every 1-2 hours! So make sure drink extra water to stay hydrated the 1st few days!

    Sunday, July 29, 2012

    Simple All Natural Ways To Get Rid Of Scars

    If you read my post on how to get rid acne then within 4-8weeks your acne should be gone or at least starting to clear up depending on how bad your acne is, which treatments you used, how many treatments you used, & how often you used them! Once your acne is gone you should continue washing your face twice a day, Drinking lots of filtered water, exfoliating 2-3 times a week, and staying stress free!

    So your acne is finally gone now you get hit with awful acne scars! Oh great what are you gonna do now?? Well continue reading this post for several awesome ways to get rid of them! By the way these might work on other scars as well maybe even stretch marks just leave on a little longer!

    1.Cucumbers: Blend up a cucumber into a paste (you shouldn't need but a portion of 1) once blended to a paste apply to your scars. Leave on for 30-45 minutes then rinse off!

    2.Apple & Honey: Place 1 peeled apple, 1 tablespoon of plain yogurt, a half of cucumber, & 1 tablespoon of honey and put in blender and blend them. Apply the mixture to your face and leave on for 20 minutes. Rinse with warm water.

    3. Olive Oil: Before bed massage olive oil into your facial skin concentrating on your scars! Massage a few minutes until your pores feel saturated! Drape a warm wash cloth over your face to steam and open your pores! Gently wipe away any excess oil. Repeat the process 1-2 more times then rinse with cold water. Then apply a thin layer of olive oil and leave on at least 15 minutes before going to bed or sleep in it!


    4.Pineapple: Take 1/4 cup of pineapple(fresh is best but not required) place in a blender and puree it. Smooth mixture over face. Leave on on for 15 minutes then rinse.

    5.Egg Whites: Egg whites have a lot of healing properties! To seperate the egg whites crack an egg in your hand and let the egg white flow through your fingers into a bowl be sure no yolk gets in! Whip 3 egg whites with a fork or whisk until they become fluffy and white! Gently spread over your scars let dry and leave on a few minutes 3-4then rinse gently with warm water! Do this 2-3 times a week!

    6.Baking Soda: Mix a small amount of baking soda with little water to form a grainy paste! Massage gently into skin and leave on 1 minute then rinse off with lukewarm water! Be sure to always moisturize afterwards!

    7. Lemon Juice: Squeeze 1-2 lemons into a small bowl or cup. Or just buy all natural lemon juice from your grocery store. Dip a cotton ball into the juice and treat the scars well but don't over do it! If you have sensitive skin it may sting a little the first 2 or 3 times. If the stinging accompanies a lot of redness, STOP using, because your skin is far too sensitive for this!

    8.Aloe Vera Juice: Aloe Vera Juice or Gel is great for getting rid of acne, burns, and soothing burns, plus it's great for your skin! I recommend you buy an Aloe Vera plant which is easy to grow. It needs very little maintenance! But if that's not something you'd consider then buy it in its all natural form! Buy aloe vera juice and refrigerate it! Drink 1/2 cup everyday to flush toxins from your body that slow the healing and regeneration of skin cells. Wash areas of your body affected by acne with a mild aloe vera soap twice a day! Massage the soap gently into the affected areas and rinse with warm water! After washing soak a cotton ball into aloe vera juice and wipe away all the excess oil! Then dab a bit of gel from an aloe vera plant or all natural store bought aloe vera gel on to your scars! Enjoy a warm aloe vera bath once or twice a week to reduce pimples and treat scars on areas other then your face! Run a warm bath and add 1 cup of aloe vera juice to the water! Soak for 15-20 minutes before washing with aloe vera soap! Rinse well and pat skin dry and add a light layer of aloe vera gel!

    * These are all natural treatments they will help you with your problem, but it will take time, patience, and
    commitment! The great thing is they won't cause any side effects!

    Saturday, July 21, 2012

    Simple Tips To Achieve Beautiful Skin *UPDATED*

    Several recipes at end of post!

    1. Stay out of the sun as much as possible as it ages the skin! But when you have to be out in the sun wear a hat, sunglasses, and always wear sunscreen with an SPF of at least 30! Summer, winter, rain, or snow! Sunscreen is the most important thing that you can do to keep yourself from looking older and to protect yourself from skin cancer! However, according to Dover SPF alone is not enough!  Studies show that antioxidants enhance the effect of sunscreen. There are many antioxidants available including the following: Vitamin E and C (also known as L'absorbic acid) Coffee berry, green tea, acai, blueberries, and pomegranate! You can consume the items but for best results apply an antioxidant cream containing the items listed for best results! The easiest to find and likely cheapest would be the vitamin E or C creams!*When selecting vitamin e and c creams make sure you choose a vitamin e cream with at least 1 percent of vitamin e to be effective. Choose a vitamin c cream with at least 5 percent of vitamin c. Apply one of the vitamin creams then apply your sunscreen!

    2. For a healthy beautiful glow in your complexion, softer skin, more moisturized skin, and healthier hair drink 10 eight ounce glasses of water a day the more the better! You'll notice the changes after about week! Drinking water is the best thing you can do for your skin, nails, and hair! If you don't eat enough fruits take a vitamin C once a day! Eat a salad every night or a servings of vegetables like carrots, cucumbers, broccoli, tomatoes, celery, beets, squash, whatever you like!

    **BONUS** If you are trying to lose weight read my lemon water post to the end as will tell you what to do, not to do, how to do it, things helps you with and more!

    3. Pour a half of cup of fresh lemon juice into your bath water! Soak in it for 20 minutes for an all over skin treatment! Take lemon slices and rub the darker areas of your skin such as your knees, elbows, back of ankles, etc to brighten up and soften your skin. Lemon juice will also fade freckles and age spots, remove pimples, scars and blackheads! Just apply the lemon juice to the areas with a cotton ball or Q tip at night before bed. Rinse with cool water the next morning! Repeat every Night. For scars age spots, & freckles it may take at least 2 - 4 weeks for best results!
    **If your skin is sensitive to the citric acid in lemons dilute the lemon juice with a bit of water!
    ~***~ DON'T GO IN THE SUN WITH LEMON ON YOUR SKIN!!! STAY OUT THE SUN FOR AT LEAST 3 TO 4 HOURS OR MORE AFTER APPLICATION!!!!!

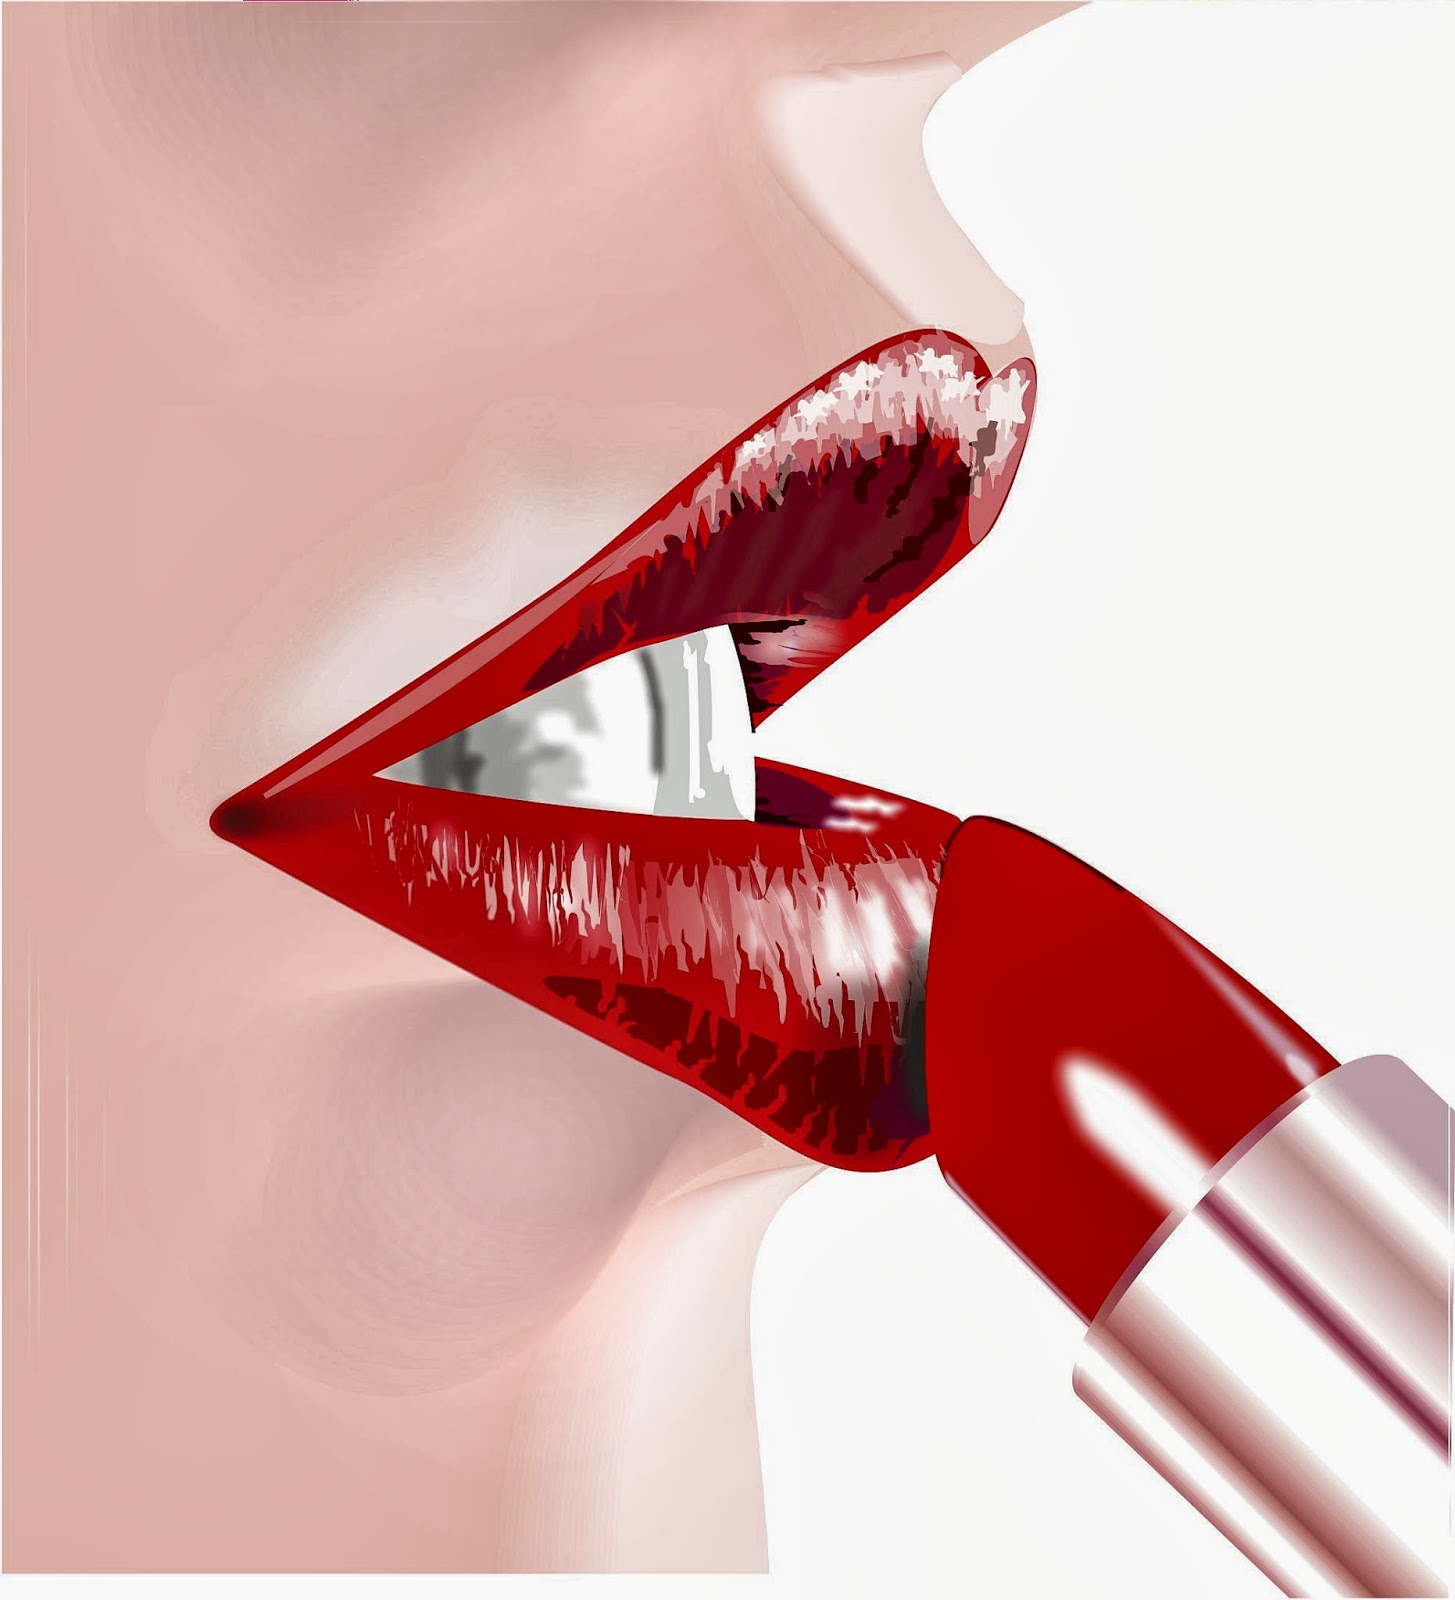
    4. Exfoliate your body 3-4 times a week!, your face as needed up to 5 times a week, & your lips 2-4 times a week! See recipes below!

    Brown Sugar Scrub:
    •2 cups brown sugar
    •1 cup olive oil or extra virgin coconut oil
    Mix the oil into the brown sugar add more or less until you have a grainy paste. Wash your face & body as you normally would! Massage scrub into skin in a circular motion! Rinse with warm water, press a warm washcloth into your face, splash with cool water, & moisturize as usual!

    Brown Sugar Lip Scrub:
    1 tablespoon brown sugar
    Honey
    Mix a few drops of honey with brown sugar until a grainy paste forms add as much honey as needed! Massage into lips in a circular motion! Rinse with warm water and apply a lip balm.

    Dry Skin Mask:
    •1 part lemon juice
    •1 part honey
    •1 part olive oil
    Mix equal amounts of each ingredient together. Apply to dry areas such as your face, feet, elbows, hands, or any other areas you have dry skin. Allow it to dry thoroughly for about 10 minutes then rinse with warm water!

    Toner For Oily Skin:
    •2 tablespoons lemon juice
    •2 tablespoons vodka
    •1 tablespoon distilled water
    •1 teaspoon witch hazel
    Mix the ingredients together and apply to skin using a cotton ball then rinse! You can store the mixture in refrigerator for up to a week!

    Anti Wrinkle Mask
    •1 teaspoon honey
    •Few drops of lemon juice
    •1 drop of sweet almond oil
    Mix together and apply to face let it sit 20 minutes then rinse off.

    Lemon Hair Rinse For Oily Hair
    •2 lemons
    •1 quart of water
    Give lemons a few firm rolls, cut in half and juice both lemons till yoou have 3 fluid ounces. Mix lemon juice with water and rinse hair to remove all the oil, grime, dirt, & build up.

    Hair Loss Treatment
    • Juice of 1 lemon
    •4 tablespoons of coconut milk
    Apply to scalp once a week

    Dandruff &Itchy Scalp Treatment
    •1 egg white
    •Juice of 1 lemon
    Roll lemon a few times firmly cut & squeeze lemon and mix with egg white. Apply mixture to scalp, rub in, and let it set for 1 hour then rinse out! Repeat weekly for a month!

    Stronger Brighter Fingernails
    •Soak nails in lemon juice for 10 minutes. Dip a nail brush in a solution of 1/2 white vinegar & 1/2 warm water and brush your nails with it, then rinse nails with warm water!

    Naturally Whiten your teeth
    •Brush your teeth with a mixture of lemon juice, salt, & baking soda daily.

    Body Detox
    •In a 8 oz glass mix warm water, the juice of a lemon, & 1 teaspoon of honey. *Don't use if you have low blood pressure! If you have blood pressure this can help a lot! Drink it twice a month like this! Remove the honey and. Drink daily every morning!

    Saturday, July 7, 2012

    How To Hide Blemishes and Look Your Best

    It never fails any time you have a party, date, meeting, or other important even scheduled, you will look in the mirror and find a very obvious pimple on your face. The next time this happens to you, do not freak out. There are many ways to quickly and effectively hide your pimples so you can go about your business looking your absolute best. Here are some tips for helping you quickly hide those occasional zits: Finding the Right ConcealersSince so many makeup products contain oils and other irritating ingredients that can worsen acne, it is important to choose quality products for your cover up efforts. Read labels carefully and make sure to buy products that offer a high level of coverage coupled with acne-fighting ingredients. For the best possible results, buy concealer, foundation, and powder that are designed to work with each other. Be sure to get the shade that matches your skin tone, as too-dark or too-light shades will draw more attention to any blemishes. How to Perform the Perfect Cover UpWash your face with a gentle face cleanser and rinse well. Gently pat the skin dry. If you are using any type "of acne medication, apply it and allow it to soak in. Apply concealer with a sponge or makeup brush. Avoid using your fingers, which can spread germs and oil that cause acne. Instead, dab the concealer directly onto the blemish and blend it carefully with a brush or sponge. Allow the concealer to dry thoroughly before continuing. Carefully dab on foundation with a makeup sponge, taking special care to not disturb the concealer. If the blemish needs additional foundation, dab it on, blending at the edges. If you are only wearing foundation over the pimple, fan the edges with a sponge to blend any trace of lines or edges. Apply an oil-free powder lightly with a very large makeup brush. This will set the makeup in place and will remove any shine, which can highlight your blemishes. Make sure to keep the powder light and blend it well to avoid a mask-like appearance to your skin. Thoroughly wash any sponges and brushes with face wash, rinse well, and let air dry. It is vital to clean your makeup tools to avoid transferring pimple producing oils and germs to your skin on the next use. If You Have Severe AcneIf you have severe, ongoing acne, you should consult a dermatologist for acne medications. You can also get advice on how best to use concealing products in conjunction with your medications. After all, the last thing you want to do is to render your treatments ineffective with your makeup. There are many special makeup products on the market that use silicon and other key ingredients to hide the redness and scars that are associated with severe acne. These products will help you be your confident best without hindering your prescription treatments. Most of all, they will make you happy with what you see in the mirror once again.

    About the AuthorJenny F. is a writer for HowDoIBe.com. If you are interested in making yourself look great with makeup and clothing, you might want to consider a career as a Fashion Designer If you are interested, take a look at this site to learn more!

    Thursday, July 5, 2012

    Natural Stretch Mark Removal Tips

    Stretch Mark Treatments
    1. Massage the areas where the stretch marks are 2-3 times a day! Rub olive oil, flax seed oil, or vitamin oil on them after you shower and before bed!
    2. Rub Natural Shea Butter on the stretch marks several times a day!
    3. Aloe Vera is known for its healing properties f or burns and some claim it does the same for stretch marks! The following is a recipe using aloe Vera and other natural ingredients to make a massage oil! -1/4 cup Aloe Vera gel -1/2 cup olive oil -2 capsules of vitamin A(only use the liquid inside) -4 capsules of vitamin E (only use the liquid inside) Mix the ingredients together Store in airtight container and put in refrigerator over night. Apply massage oil to affected area as needed!
    4. Apply cocoa butter on them twice a day, morning and night
    5. Use an apricot scrub on the areas you have stretch marks at least once a day twice if you can!
    6. Apply lavender oil on the stretch marks!
    7. Cut medium sized potato pieces and rub it gently on the stretch marks for a few minutes. Make sure the potato juice covers affected area.Let it dry and wash off with lukewwarm water.
    8. Massage twice a day with warm raw virgin coconut oil.

    Recommendations
    • I would recommend you do 2 maybe 3 of the above treatments!
    • I would do the apricot scrub, the aloe Vera massage oil recipe, & massage twice a day with warm coconut oil which is also great for cellulite & moisturizing skin.!  Do 1 or more of the above everyday for a period of 3 to 6 months to see full effect!

    Tuesday, July 3, 2012

    Look Younger In 5 Minutes

    Make your face look younger! Get of the signs of aging, smooth out wrinkles and fill in hollows under your eyes, by using this easy, clever, natural, technique! Doesn't matter whether you're in your 30's or 60's Recapture lost muscle tone, regain your youthful looks, and infuse your complexion with natural beauty! This is possible by have a superior blood supply to the blood vessels just below the surface of the skin! A good blood supply is vital for your face to take on a more youthful and glowing appearance! The best way to increase the blood supply to your face is by giving it a deep massage! If done regularly it will improve skins elasticity, smooth wrinkles, prevent wrinkles, tone your face muscles, and improve your complexion! Step 1: Cleanse your skin, apply toner, and apply your moisturizer but just smooth it on DON'T rub it in! * Never attemp to massage without some type of moisturizer or oil!* Step 2: Place both hands flat on your face and with your fingertips massage the moisturizer into your skin, using firm, circular, upard movements! *the upward direction is crucial to achieve natural results! Never go down or drag the skin! Step 3: At the same time do the following, hold your head up, chin thrust forward, mouth open and your eyes wide open to smooth your skin Step 4: For the hollows under your eyes use your usual eye cream on both middle fingers tense the muscles in the lower lids and at the same time massage the cream into yourskin in circular upwards movements only! Step 5: Make the massage as firm and deep as you can, but do your best not to pull or drag your skin! Your fingers must glide easily across your face, but at the same time must create friction and warmth! Do your entire face including the forehead, hairline, chin, jaw and jaw line! Do this daily! Please take before and after pictures! Wait around a month before you take the after picture! Then email the pictures to me at Martisa05@gmail.com and ill post them!